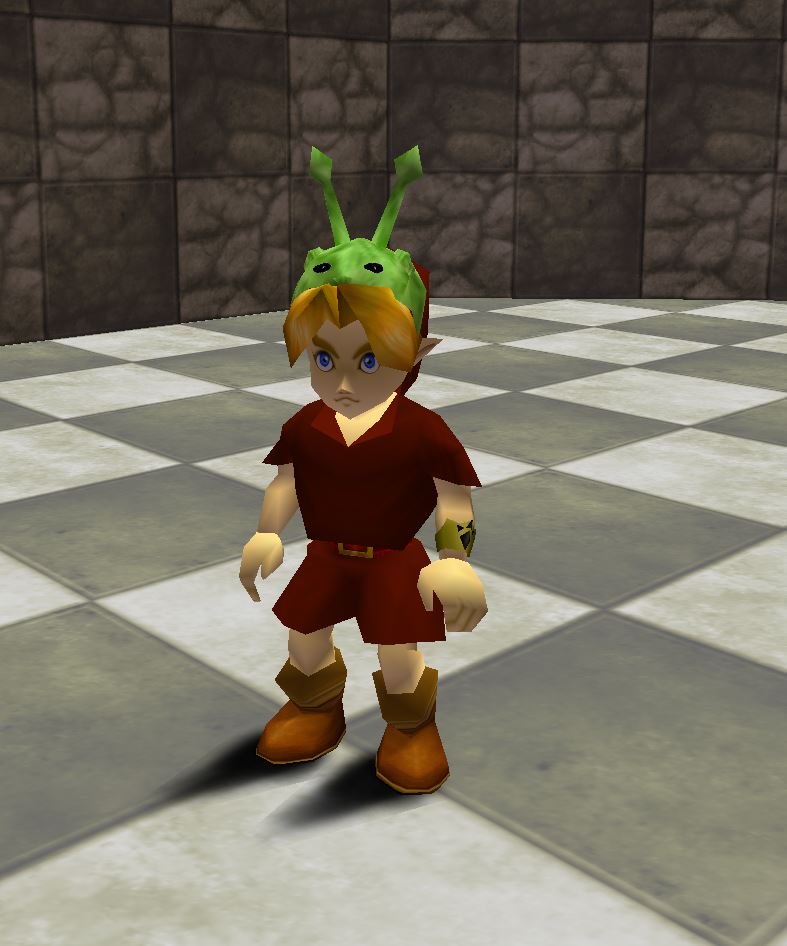
Custom Bunny Hoods
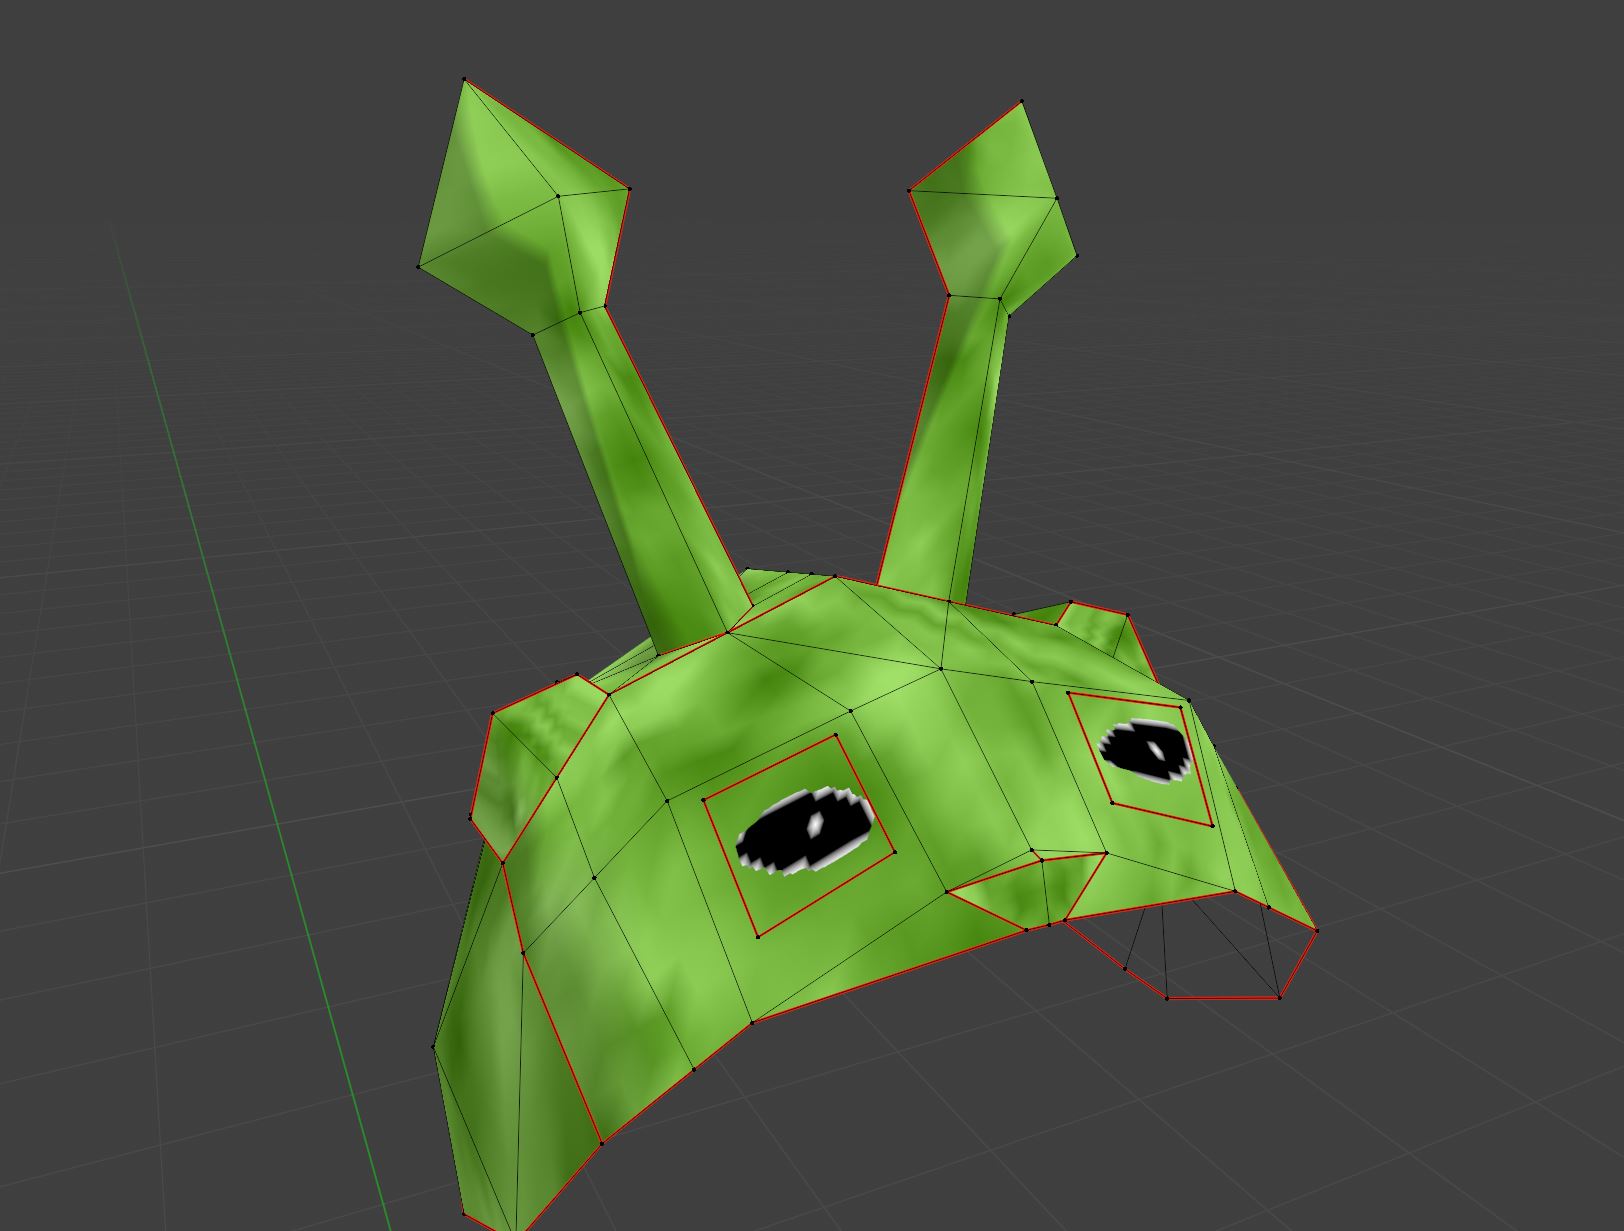
When I've made my bunnyhoods I've used Blender 4.1 with the HM64 2.30 fork of Fast64 I don't know if that info matters but it may be helpful to someone.
Custom bunny hoods are luckily not cbt to make! The trick is editing the DL file to point to two very special matrix's that the bunny hood needs
This guide won’t cover making the actual mesh, just the rigging, weighting, dl editing and getting it into game. Though I will recommend when making your mesh I’d advise you not to have any vertices between the base and tip as we only have two bones to work with so we can’t have smooth transitions between the head the ear
Like any rigged DL, you need to make sure there's vertices assigned to each bone, I tend to make tiny faces at each bone origin then weight those vertices to that bone
The vanilla bunny hood textures, regardless of custom model seems to get corrupted while wearing an edited Goron bracelet, I'm not sure why.
Edited bunny hoods with their own materials seem to be ok with Goron bracelets
This guide won’t cover making the actual mesh, just the rigging, weighting, dl editing and getting it into game, though I will recommend when making your mesh I’d advise you not to have any vertices between the base and tip as we only have two bones to work with so we can’t have smooth transitions between the head the ear Also Like any rigged DL, you also need to make sure there's vertices assigned to each bone, I tend to make tiny faces at each bone origin assigned to that bone The vanilla bunny hood textures regardless of custom model seems to get corrupted while wearing an edited Goron bracelet, I'm not sure why edited bunny hoods with their own materials seem to be ok with Goron bracelets
The entire bunny hood vanilla mesh seems very strange and broken I do not recommend using it as a base, it's materials seem odd too
Material Info
Give the base any material like you would any other object double check it's format is RGBA 16-bit
Regarding the ears THIS IS VERY IMPORTANT The vertices that are weighted to each ears/bits that jiggle, should only have 1 Material, else your mesh will explode apart and not work right.
You can have multiple materials on your mesh but only have one per ear bone
Skeleton editing
For each ear to work we’ve got to add the extra bones to the skeleton, select Link's skeleton in object mode, and duplicate it with Ctrl+D
Rename both the armature object (orange man icon) and the Armature (The green man) they can share a name, in my case it's Bunnyskell
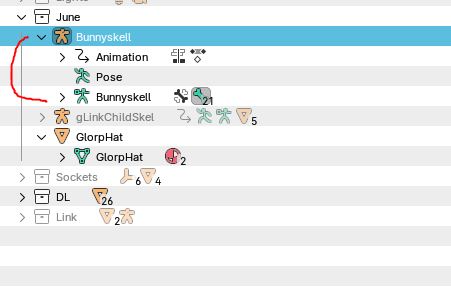
Either copy the hat bone or go into edit mode an add a bone (length don't matter I tend to keep mine small or close to Link’s other bones), make sure the bone does not have "Connected" ticked then make that bone a child of Link’s head bone bone010_gLinkChildHeadLimb
Position the new bone at the base of one of your ears, The rotation of the bones matters as does their roll value Rotate it so the small part/tail of bone is facing in the same direction as link is facing in The bone’s X axis should point up and the Z axis should point to their left, Y should be pointing in the direction of the bone
Now add another bone for the other ear, you can mirror the one you have or duplicate it and move it etc, add it however you want just make sure the rotations are the same
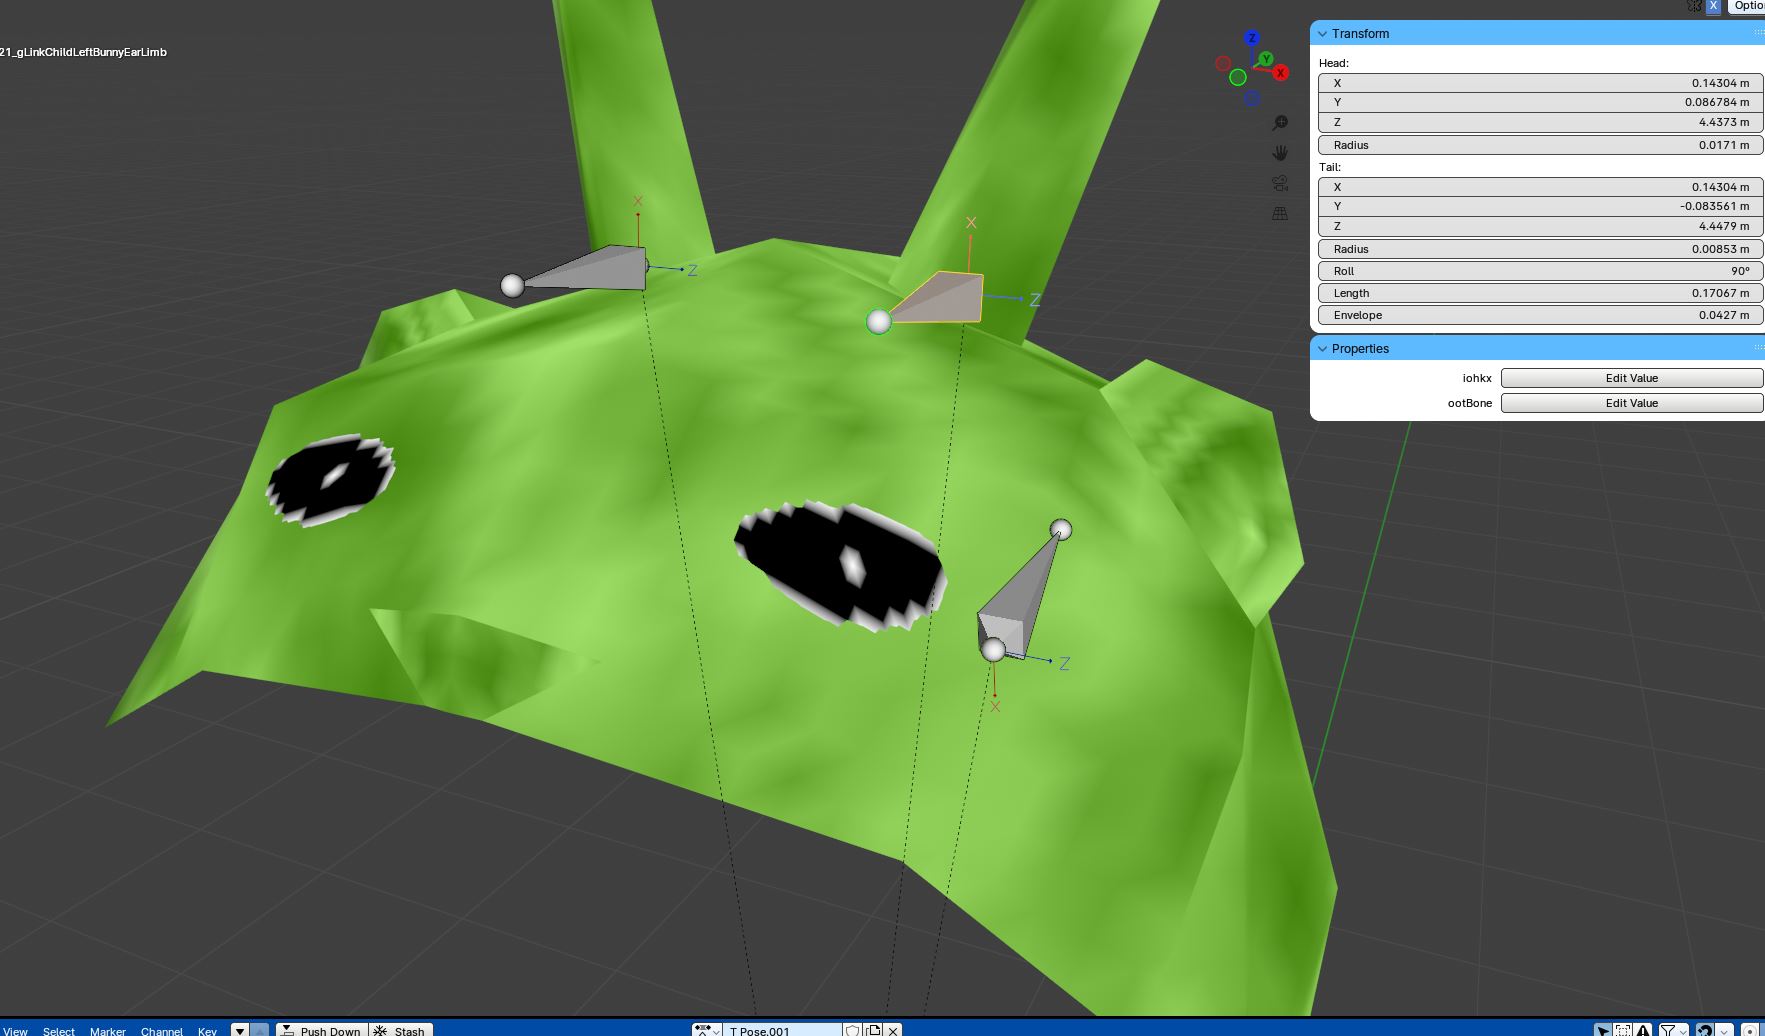
Now rename the bones
bone021_gLinkChildLeftBunnyEarLimb for the left ear
bone022_gLinkChildRightBunnyEarLimb for the right ear
I don't think the names matter but I'm using this, if you're wondering I start at 021 as link's bones end at 20 so any new ones need to start after 20
Weight Painting
With the skeleton duped and the bones copied we now need to rig the bunny hood to the new skeleton you can do this by going back to object mode select the bunny hood then the skeleton Press Ctrl+P then Armature Deform With Automatic Groups
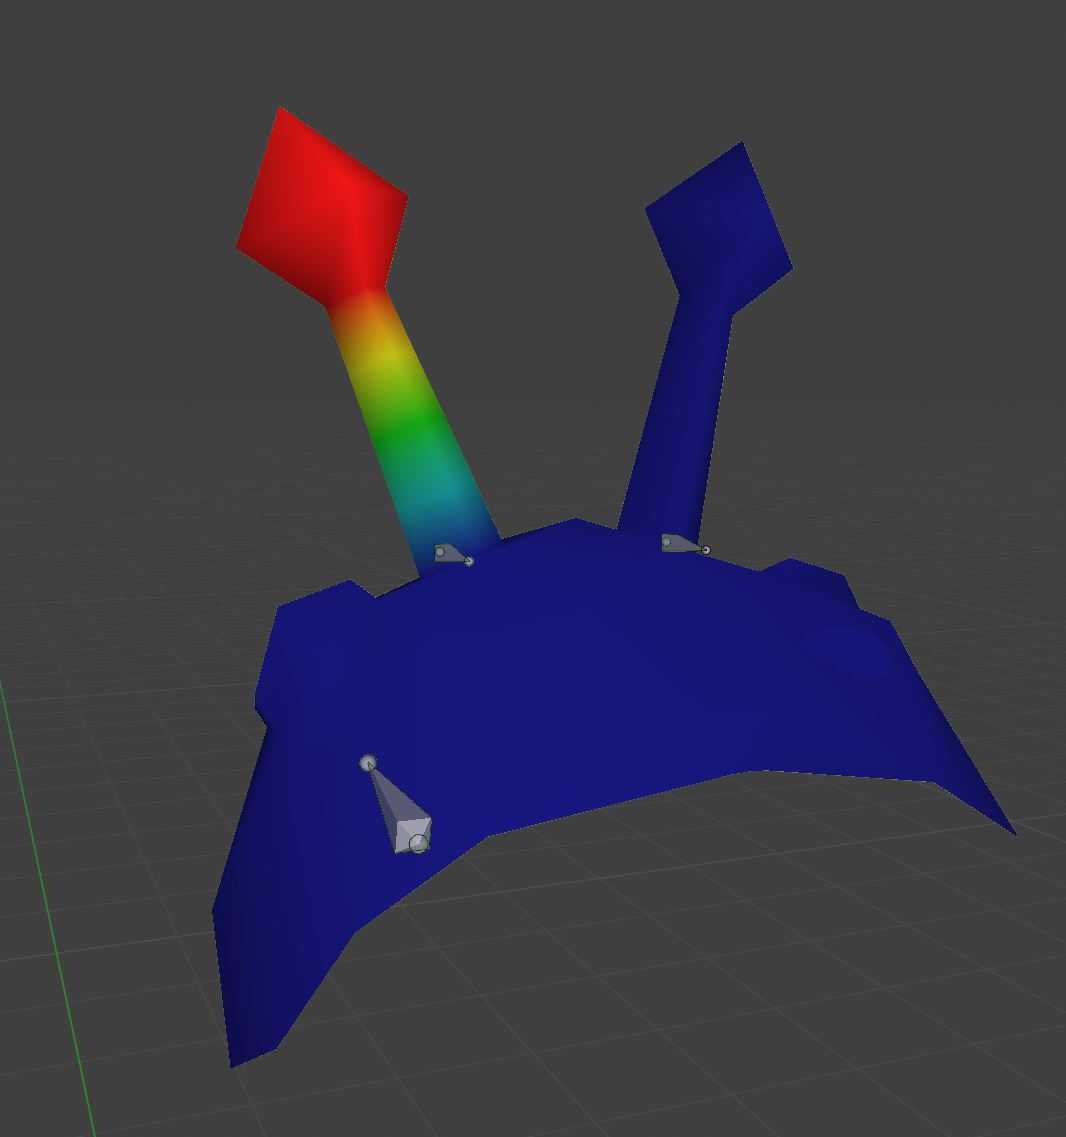
With the bunny hood you only want the tip of the ears to be weighted to each ear bone, the base of each ear should be weighted to the head (bone010_gLinkChildHeadLimb) make sure the part of the mesh that sits on Link’s head is weighted to his head too
Also you need to make sure you have some mesh(not the bunny hood itself) weighted to each bone, a single vert or single face at the origin of every other bone should suffice
To check if the weights are good, stay in edit mode, unselect all vertices, pick a bone in the data vertex group list then press “Select” to see what vertices have been weighted
Red means full weight
Blue means no weight
Exporting the Skeleton
We should be good to export it now, select the skeleton
Sometimes the Microcode you use to export can create issues if you're having issues try a different microcode f3dex/lx or f3dex2, both of them seem good, f3dex3 is not supported in SOH.
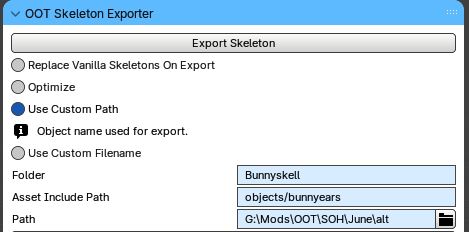
Open the OOT Tab(not the fast64 tab) make sure "Use Custom Path" is ticked I don't have "Optimize" turned on(I have no idea what that would do) I don't have "Use Custom Filename" on either
For the folder name, I tend to use my skeleton name so in my case it's Bunnyskell
For the Asset Include Path, don't use any existing paths, i.e. don't use something like objects/object_link_child, objects/object_link_boy_hoverboots or objects/object_link_boy_goron etc
Other than that restriction you can set whatever name you want as long as it's in the objects sub folder, in my case it's objects/bunnyears
“Path” would be where your working directory is
Make sure the bunny hood exports to it's own folder and not overwriting anything else
Display List editing
This is the scary part but it's not hard! If you done the rigged-dls tutorial this is a very similar process We need to leave Blender and make our DL inside the object_link_child folder, not in the folder we exported our bunny hood to
Make a new text file in the objects/object_link_child folder and save it as gLinkChildBunnyHoodDL MAKE SURE IT HAS NO EXTENSION
This name is very important as it refers to the actual bunny hood in the game's files, if you have the wrong name nothing will show up in game
Copy this into the file
<DisplayList Version="0">
	<Matrix Path=">0x0d0001c0" Param="G_MTX_LOAD"/>
	<CallDisplayList Path="objects/bunnyears/bone010_gLinkChildHeadLimb_mesh_layer_Opaque"/>
	<Matrix Path=">0x0B000000" Param="G_MTX_MUL"/>
	<CallDisplayList Path="objects/bunnyears/bone022_gLinkChildRightBunnyEarLimb_mesh_layer_Opaque"/>
	<Matrix Path=">0x0B000040" Param="G_MTX_MUL"/>
	<CallDisplayList Path="objects/bunnyears/bone021_gLinkChildLeftBunnyEarLimb_mesh_layer_Opaque"/>
	<PipeSync/>
	<SetGeometryMode G_LIGHTING="1" />
	<ClearGeometryMode G_TEXTURE_GEN="1" />
	<SetCombineLERP A0="G_CCMUX_0" B0="G_CCMUX_0" C0="G_CCMUX_0" D0="G_CCMUX_SHADE" Aa0="G_ACMUX_0" Ab0="G_ACMUX_0" Ac0="G_ACMUX_0" Ad0="G_ACMUX_ENVIRONMENT" A1="G_CCMUX_0" B1="G_CCMUX_0" C1="G_CCMUX_0" D1="G_CCMUX_SHADE" Aa1="G_ACMUX_0" Ab1="G_ACMUX_0" Ac1="G_ACMUX_0" Ad1="G_ACMUX_ENVIRONMENT"/>
	<Texture S="65535" T="65535" Level="0" Tile="0" On="0"/>
	<EndDisplayList/>
</DisplayList>
What you need to do here is change objects/bunnyears/ to the folder you exported your bunny hood to
Then change
bone022_gLinkChildRightBunnyEarLimb
bone021_gLinkChildLeftBunnyEarLimb
to whatever you had your ear bones called MAKE sure they have _mesh_layer_Opaque as a prefix like in the example
The big thing with the bunny hood is assigning these bones to these specific matrixes
0x0B000000 and 0x0B000040 these are very special matrixes that are only used by the bunny hood, this is what gives the ears "physics", they only work when the bunny hood is equipped, so you can't really add physics to any other body parts without the bunny hood being active
Don't mix these up
0x0B000000is for the Right Ear0x0B000040is for the Left Ear
Also most DLs use the parameter G_MTX_LOAD but the bunny hood's ears need to have the G_MTX_MUL parameter
Save your DL and double check in windows explorer that it does not have an extension
Once done package your mod like you would normally and try it out in game!